MatrixPro Tutorial - Exporting
Description
In this tutorial, you will be shown how to create and use SVG-animations and TeXdraw pictures. The things you should learn in this tutorial are:
- Exporting SVG-animations
- Embedding SVG-animation in web-pages
- Exporting LaTeX pictures
- Using LaTeX pictures in LaTeX documents
Introduction
The export can be done in two formats: LaTeX picture or SVG animation. The LaTeX pictures can be easily included in LaTeX documents and the SVG animations can be easile used on web-pages. Example of an SVG animation is available here. You can also take a look at an example of LaTeX picture source and a document containing the picture.
Start by opening an existing animation or create an animation you would like to export.
Exporting SVG-animations
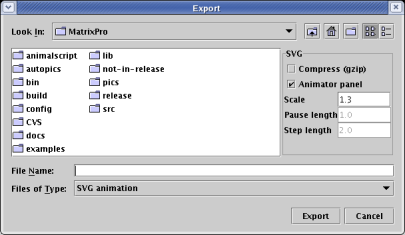
The animation can be exported as an SVG-animation by selecting Export.. from the File menu. This will open a dialog like the one in Figure 1. The export format can be selected from the Files of Type drop-down list.

Figure 1. The export dialog.
With SVG there are several selections to be made. The SVG file can be compressed with gzip by selecting the Compress (gzip) option. Note that the compressed SVG animations can be opened with Adobe's SVG plug-in. A panel that controls the animation can be added to the SVG by selecting the Animator panel option. The animation can be scaled by changing the value in the Scale text box.
A panel that controls the animation can be added to the SVG by selecting the Animator panel option. The panel looks like the one in Figure 2. When the animator panel option is not chosen, two more options are available. Pause length is the length of the pause between steps (in seconds). Step length is the length of one step of animation (in seconds).

Figure 2. Animator panel in SVG animations
Embedding SVG-animation in web-pages
The animation can be embedded into a web-page using the following piece of html:
<embed type="image/svg" width="xx" height="yy" src="filename.svg"/>
Exporting LaTeX pictures
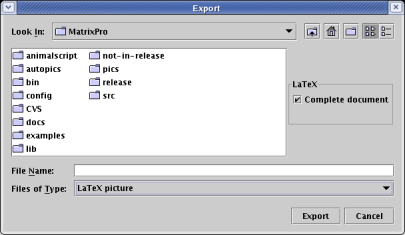
The current view can be exported as a LaTeX picture by selecting Export.. from the File menu. The export format can be selected from the Files of Type drop-down list. To export LaTeX pictures, the selected export format should be LaTeX picture Now the dialog should look like the one in Figure 3.

Figure 3. The export dialog when LaTeX picture format is selected.
With LaTeX export it can be selected whether or not to export a complete LaTeX document or just a document fragment. This can be done by selecting (or unselecting) the Complete document checkbox. LaTeX export creates a TeXdraw representation of the current view.
Using LaTeX pictures in documents
The complete documents exported are complete documents. If you want to use the pictures in other documents, it is easier not to export compelete documents.
To use the document fragments in a LaTeX document, the following steps must be done.
- The TeXdraw macropackage must be loaded. This can be done by adding the following line to the document specification: \input{texdraw}.
- The document fragment must be added into the wanted position with
the latex command \input{filename}. A good way to use the document fragment as a figure is:
\begin{figure}[h!]
\begin{center}
\input{filename}
\end{center}
\label{Label}
\caption{Caption}
\end{figure}
The size of the picture can be changed by modifying the following line in the text
\newcommand{\scale}{1}
Setting the scale, for example, 0.5 makes the picture half the original size.
This document last modified 2006-04-25.
<URL: http://cse.tkk.fi/en/research/MatrixPro/tutorials/export_tutorial.shtml>